
How to Do Diamond Painting: A Beginner’s Step-by-Step Guide
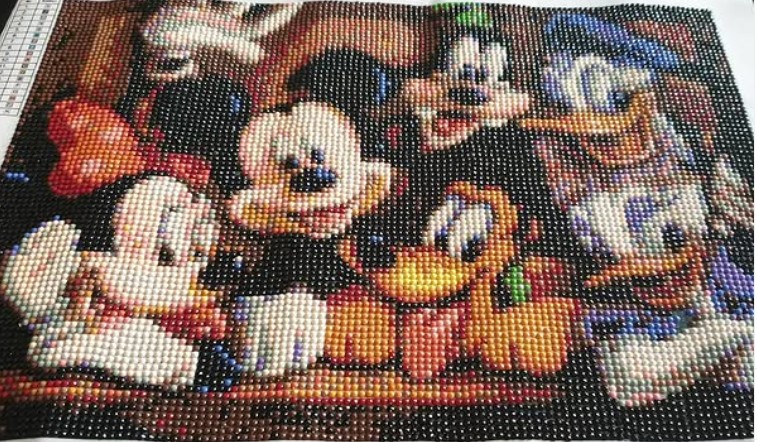
Everything you need to know to create your first sparkling diamond painting
Diamond painting is a relaxing craft that combines the careful placement of tiny resin drills with the colour-coded design of a mosaic. With a few basic tools and a little patience, you can create a bright, detailed picture to display or give as a thoughtful handmade gift.
What You’ll Need
Most diamond painting kits contain everything required to get started. Check that your kit includes the following:
- A printed canvas with a protective covering
- Coloured resin diamonds, also called drills
- A diamond applicator pen
- A tray for holding the drills
- Wax or gel for picking up the drills
- Small bags or containers for organising colours
Different Types Of Applicator Tools
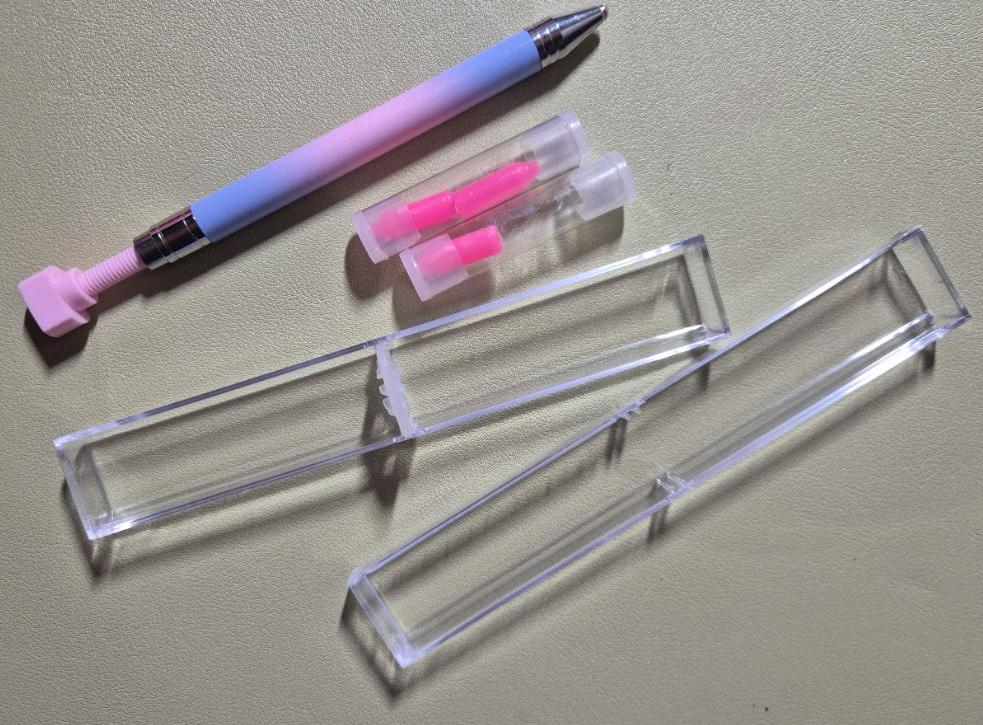
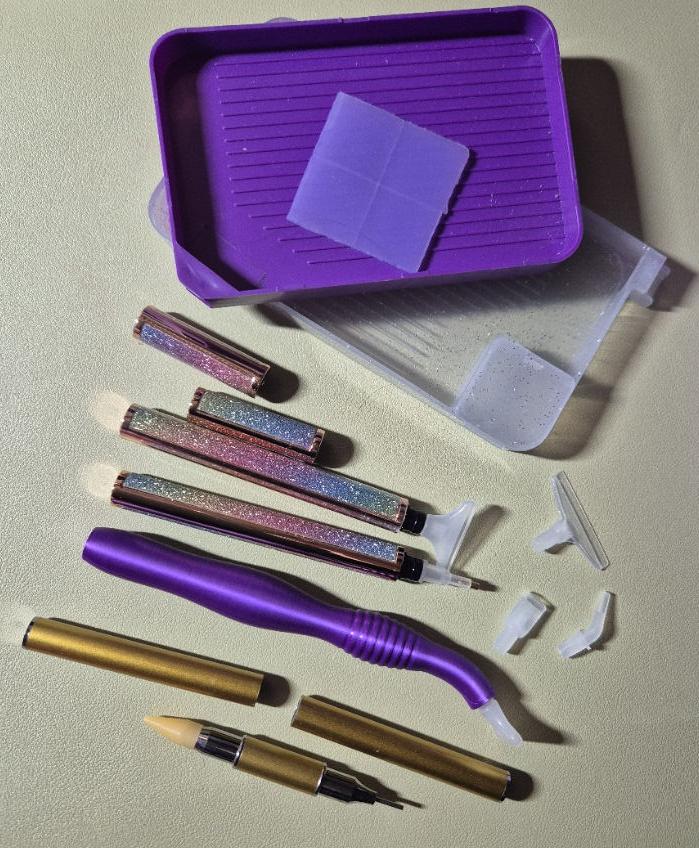
Applicators come in several shapes and styles, but the main differences are in the handle and the tip used to pick up the drills. The first two photos show a selection of straight pens, a curved pen and interchangeable attachments. Here is what each type is useful for.
Straight, single-placer pens: The pink-and-blue pen in the first photo has a narrow metal tip at one end for placing one drill at a time. This type of tip is useful for small details, scattered colours and filling individual gaps. The glittery pens in the second photo offer another style of straight handle; the attachment fitted to the end determines whether the pen places one drill or several.
Multi-placer attachments: The wider pink attachment on the opposite end of the first pen and the broad clear attachments in the second photo are examples of tips for working across a row. Multi-placers pick up several drills of the same colour at once, making them useful for larger blocks of colour. Line the drills up in the tray, load the tip with a little wax or putty and transfer the row to the matching symbols. The number of drills a tip holds depends on its size; the exact capacities are not clear from these photos.
Curved applicator pens: The purple pen in the second photo has a ridged grip and a curved neck, with a clear tip fitted at the end. Its shape gives you a different holding angle from a straight pen. Whether you prefer a curved or straight handle is a matter of personal comfort, so try both if you have them available.
Wax-tipped pick-up tools: The gold-coloured, double-ended tool in the second photo appears to have a pointed wax tip at one end and a fine metal tip at the other. Wax-tipped tools use the tackiness of the tip itself to lift individual drills, rather than a hollow tip filled with separate wax. Check the instructions for this particular tool before using it, as its exact design cannot be confirmed from the photo alone.
Interchangeable tips and straighteners: The loose clear attachments in the second photo let you change the working end of a compatible pen. A broad, flat straightener attachment is for gently nudging placed drills into line rather than picking them up. Not every attachment fits every handle, so check the fit before swapping tips. The clear rectangular cases in the first photo are storage accessories, not applicators.
Step 1: Prepare Your Workspace
Choose a clean, flat surface with plenty of light. A desk or table is ideal, but a portable craft board can also work well. Keep drinks, food and pets away from the canvas so that the adhesive surface stays clean and the tiny drills do not get lost.
Before beginning, gently flatten the canvas if it has been rolled. Place a few heavy books on top for several hours, or follow the instructions supplied with the kit. Avoid folding the canvas, as creases can make it difficult to place the drills neatly.
Step 2: Understand the Chart
Look at the printed chart on the canvas. Each symbol represents a particular colour, and the chart will usually include a key showing the symbol, colour code and number of drills required. Compare the symbols on the canvas with the labels on the drill packets before opening them.
Diamond painting canvases may use either round or square drills. Round drills are slightly easier for beginners because small gaps may appear between them. Square drills create a more tightly tiled finish, but they need to be positioned carefully.
Step 3: Organise the Drills
Sort the drills by colour and label. You can keep them in the original packets, or transfer them into small pots, resealable bags or a storage box. Label each container clearly so that you can find the correct colour quickly.
It is helpful to work with one colour at a time, particularly when you are learning. Pour a small number of drills into the tray rather than emptying the entire packet. Gently shake the tray from side to side so that the drills turn face-up and line up in the grooves.
Step 4: Load the Applicator Pen
Remove a small amount of wax or gel from the container using the tip of the applicator pen. Press the pen gently into the wax so that a small amount fills the opening. You do not need much; too much wax can make the drills difficult to release.
Step 5: Expose a Small Section
Peel back only a small portion of the protective covering, roughly the size of a few postage stamps. Working in small sections keeps the adhesive fresh and reduces the chance of dust or lint sticking to the canvas.
If the protective sheet is difficult to handle, cut it into manageable sections with scissors. Alternatively, place small pieces of release paper over areas you are not currently working on. Do not remove the entire cover at once unless you expect to finish the painting in a single session.
Step 6: Place the Drills
Press the tip of the loaded pen gently onto the flat side of a drill. The wax should pick it up. Position the pointed or textured side of the drill over the matching symbol on the canvas, then press down lightly.
Continue placing drills one at a time. Work from one edge of the exposed section towards the other, or complete a small block of one colour before moving to the next. Try not to press too firmly, as excessive pressure may squeeze adhesive around the edges of the drills.
Step 7: Keep Rows Neat
For a tidy finish, use the printed grid as a guide and keep the drills aligned with the surrounding symbols. A straightener tool, ruler or the flat edge of a clean craft tool can help adjust several drills at once. Make small corrections before the drills become firmly set.
Do not worry if the first few rows are not perfect. Your alignment will improve with practice, and the overall image will become clearer as more of the canvas is covered.
Step 8: Continue in Sections
When a section is complete, cover it again with the protective sheet or a piece of release paper. Move to the next section and repeat the process: identify the colour, prepare the drills, expose a small area and place the drills carefully.
Some crafters prefer to work colour by colour across the whole canvas, while others complete one small section at a time. Try both approaches to find the method that feels most comfortable.
Helpful Tips for Beginners
- Use good lighting: A bright desk lamp can make similar symbols easier to distinguish.
- Keep your labels: Do not discard drill packets until the painting is finished in case you need the colour code later.
- Work in short sessions: Taking regular breaks can reduce eye strain and hand fatigue.
- Protect the canvas: Keep the adhesive covered whenever you are not working on it.
- Use a multi-placer carefully: Once you are confident, a multi-placer pen can apply several drills in a row at the same time.
- Keep spare drills: Set aside a few leftover drills from each colour in case one is lost or damaged.
Common Problems and Solutions
Drills will not stick
Check that the protective covering has been removed from the section you are working on and that the adhesive is clean. You may also need to add a small amount of fresh wax to the applicator pen.
The drills look uneven
Use the edge of a straightener or a clean ruler to nudge them gently into line. Avoid lifting large areas unless necessary, as this can disturb nearby drills.
The symbols are difficult to read
Move the canvas closer to a light source or use a magnifying lamp. Working on a small section at a time can also make the chart easier to follow.
There are gaps between the drills
Small gaps are normal with round drills. If you are using square drills, check that each one is positioned straight and that the canvas is lying flat.
Finishing Your Diamond Painting
When you have placed the final drill, check the entire canvas for loose or misaligned pieces. Press the completed surface gently with a clean roller, a flat book or the palm of your hand protected by a sheet of release paper.
Leave the finished painting flat for a while so that the drills settle securely. If you plan to frame it, choose a frame that fits the canvas and mount it carefully. A finished diamond painting can also be displayed on a foam board or kept in a protective folder.
Final Thoughts
Diamond painting is an enjoyable craft that rewards steady progress rather than speed. Start with a small design, organise your materials and work in manageable sections. Before long, you will have a colourful, sparkling picture created entirely by hand.

Craft blogger, paint‑by‑numbers hobbyist, and miniature‑making enthusiast. I test kits hands‑on and share honest comparisons to help beginners choose the right craft supplies.
Discover more from Shell's Designs
Subscribe to get the latest posts sent to your email.